Thursday, October 28, 2010

vegetable Curry

Recently I have heard several news stories on the new trend of hiding vegetable in food so that unsuspecting children will get their daily serving without even knowing it...or at least that is the theory.  I'm going to officially come out against this practice!

If you hide vegetables from your kids you are only perpetuating the stereotype that vegetables are yucky and have to be snuck into children like a dog's heart worm medicine!  Instead of hiding the veggies how about teaching our kids that they can be delicious?  Here are a few things that YOU can do to avoid vegetable subterfuge.

1.  Buy fresh. If you have ever compared canned green beans to fresh green beans you will agree that the canned variety bear little resemblance to fresh.  Canned green beans are gray and mushy and taste like....well I don't know what they taste like, but it's not good.

2.  Don't over cook.  The longer you cook vegetables the more of their nutrients and flavor they lose.  Lots of veggie, like broccoli, carrots and green beans only need a quick steam.  Some, like peppers and jucima, are great raw.

3.  Think outside the box.  Sometimes you need to extol the OTHER virtues of vegetables.   For example, eating beets make you look like you have been drinking blood and asparagus makes your pee smell funny.  While these may  not be selling pints for YOU, little boys will totally fall for them.


4.  Try something new.  About a year ago I made vegetable curry for my family.  I figured I have to hold the kids down and force it into them.  Imagine my surprise when my oldest son LOVED it.  he can't get enough of the stuff.  It is very favorite meal.  Sometimes it pays off to go a little crazy.


5.  Don't give up.  I have heard that it take over 15 exposures to a food for a child to be comfortable with that food.  If your kids turn their noses up at broccoli the first time keep trying. Eventually you will break them...I mean....get them to love their veggies!

Wednesday, October 27, 2010

Winter Produce

Winter is coming up quickly and while most people don't think of produce when they think of winter time, there are actually a lot of great winter fruits just coming into season now!  One of my very favorite winter delicacies are pomegranates.  In my half of the world pomegranates are available from around September until February.  Such a short time frame, I have to gobble them up while they are available!

Pomegranates are chock full of good stuff for you like vitamins C and B and TONS of fiber (but only if you eat the seeds).  Speaking of which, pomegranates are a little odd in that you eat the bright red seeds and not the white fruit.  Trust me on this one...don't eat the white fruit part! 


So do not delay!  Run out an enjoy this fabulous winter treat!

Tuesday, October 26, 2010

Starbucks can kiss my pumpkin

I have a weakness for the Starbuck's Pumpkin muffin.  You know the one with the cream cheese in the middle...yeah...that's the one.  They are only around for a few weeks in the fall, and I could eat one everyday that they are available.  Sadly, that gets a little expensive.  When I saw a recipe for a cream cheese filled pumpkin muffin on Annie Eats, I was pretty much sold. 

A few thoughts...

It is really very hard to shape beaten cream cheese into a log.  When I think log, I think round....think more like brick.  Also, don't scrimp on the freezing cream cheese part.  I only left mine in the freezer for about an hour and that was no where near long enough.

Finally, this recipe uses oil as the fat.  I generally prefer to use butter in my baking. (Who doesn't like butter?)  I'm wondering what anyone out there thinks about substituting butter for oil.  Is it a one to one substitution?  Do you need to account for extra water in the butter?  Thoughts?

Monday, October 25, 2010

menu plan monday


We are back in business as far as the stove in concerned so this week's menu is going to be sure to make full use of the new hotbox.


Tuesday - Turkey Tetrazzini Pasta

Thursday - Honey-Sesame Pork Tenderloin with Spicy Scallion Salad

Saturday - Chicken Nuggets

Sunday - Ricotta Calzones

Last week Kate from Practice is Perfect asked me for my Turkey Tetrazzini  recipe.  This is a personal favorite of mine.  I like dishes where pretty much everything is taken care of in one pot...or casserole dish as the case may be.  This recipe is from Cook's Illustrated.  I generally make a few small changes.  I prefer to use a small pasta as opposed to spaghetti.  With kids, spaghetti can be a messy disaster.  I like bow ties myself.   I also like to bump up the amount of peas because they are a quick and easy veggie and my kids will eat them in this casserole.  Finally, I have found that this can get dried out pretty easily.  I usually try to add a little more butter and stock to the sauce.

ENJOY!

Ingredients

Topping


1/2 cup fresh breadcrumbs
Pinch table salt
1 1/2 tablespoons unsalted butter melted
1 ounce Parmesan cheese , grated (about 1/4 cup)

Filling


6 tablespoons unsalted butter (3/4 stick), plus extra for baking dish
8 ounces white mushrooms , cleaned and sliced thin (3 cups)
2 medium onions , chopped fine (1 1/2 cups)
3/4 pound spaghetti or other long-strand pasta, strands snapped in half
1/4 cup unbleached all-purpose flour
2 cups chicken stock or canned low-sodium chicken broth
3 tablespoons dry sherry
3 ounces Parmesan cheese , grated (about 3/4 cup)
1/4 teaspoon fresh grated nutmeg
2 teaspoons lemon juice from 1 small lemon
2 teaspoons minced fresh thyme leaves
2 cups frozen peas
4 cups leftover cooked boneless turkey meat or chicken meat, cut into 1/4-inch pieces


Instructions

1. For the Topping: Adjust oven rack to middle position and heat oven to 350 degrees. Mix breadcrumbs, salt, and butter in small baking dish; bake until golden brown and crisp, 15 to 20 minutes. Cool to room temperature and mix with 1/4 cup grated Parmesan in small bowl. Set aside.

2. For the Filling: Increase oven temperature to 450 degrees. Heat 2 tablespoons butter in large skillet over medium heat until foaming subsides; add mushrooms and onions and sauté, stirring frequently, until onions soften and mushroom liquid evaporates, 12 to 15 minutes. Season with salt and ground black pepper to taste; transfer to medium bowl and set aside. Meanwhile, cook pasta in large pot of boiling, salted water until al dente. Reserve 1/4 cup cooking water, drain spaghetti, and return to pot with reserved liquid.

3. For the Sauce: Melt remaining 4 tablespoons butter in cleaned skillet over medium heat. When foam subsides, whisk in flour and cook, whisking constantly, until flour turns golden, 1 to 2 minutes. Whisking constantly, gradually add chicken stock. Adjust heat to medium-high and simmer until mixture thickens, 3 to 4 minutes. Off heat, whisk in sherry, Parmesan, nutmeg, 1/2 teaspoon salt, lemon juice, and thyme. Add sauce, sautéed vegetables, peas, and meat to spaghetti and mix well; adjust seasonings to taste. Turn mixture into a buttered 13- x 9-inch baking dish (or other shallow, ovenproof dish of similar size), sprinkle evenly with reserved breadcrumbs, and bake until breadcrumbs brown and mixture is bubbly, 13 to 15 minutes. Serve immediately.

Friday, October 22, 2010

Banana Nut Chocolate Chip Cookies

Bananas can be fiddly little buggers.  You see them in the grocery and you think to yourself "Yummy!  Bananas!"  That's how they get you.  You can never actually eat the bananas that you bring home from the store.  They are always a little too green.  So you put them on the counter somewhere.  If you're like me 50% of the time you just plain forget that they are there.  Two weeks later you move aside a box of crackers or a kitchen towel or something and there are your bananas - all brown and mushy.  The other 50% of the time your yearning for bananas just doesn't last as long as it takes for the bananas to ripen.  By the time they are ready to be eaten you see them and just thing "huh.....bananas."  I don't think that we have ever finished a bunch of bananas before at least 2 of them entered the mushy, brown stage. 

Naturally, if you are a smart little cookies like me, you now progress to the banana bread stage.  Bananas that have been deemed no longer edible by your kids are perfect for banana bread.  At least if you have an oven that is what you do.  But what if you don't have an oven....say perhaps your oven has been out of commission for more than 3 weeks.

Just as I was about to toss the bananas into the compost bin I stumbled onto this little gem - Banana Chocolate chip cookies....Hello!!!  I could easily mix up these cookies and then pop them into the freezer where they would enter a sort of time warp stasis until my oven (finally) arrived and I was able to bake them up.  This means that not only would I get to use the bananas, but I would be all geared up to bake as soon as the oven delivery guy left!  XANADU!!

I followed the directions to the letter except where I put all the chocolate chips into the batter.  Then I scooped out nice big cookie sized scoops and froze them on a cookie sheet.  Once they were nicely frozen I put them into a freezer bag and moved them into the cryogenic chamber otherwise known as my chest freezer.


And there they lingered until Monday afternoon when the my new best friend, Ramone, showed up with the oven.  After much banking and pounding and  lot of ominous sighing, my oven was installed and heating up.  I popped the cookies, fresh from the freezer into a 300° oven and left them to bake for 30 minutes.  They emerged beautiful, browned and yummy. 

I think that banana cookies may be the new banana bread.

Thursday, October 21, 2010

Dessert Samosas

I was having a conversation the other day about samosas.  I had just learned the technique and was thinking about variations.  I have mentioned before that I am a fly by the seat of my pants, try anything once kinda gal...some people --- not so much.  I began musing about the possibility of dessert samosas, I was told that that was a foolish idea....whatever would I put into them??  I just couldn't be done!!

Well my friends, I know a challenge when I hear one!


First I had to decide on a suitable dessert type filling.  I asked a number of experienced cooks, including Shyama's mother and got a number of interesting ideas. I decided that I wanted a fruit filling, something that didn't really NEED to be cooked, but that would hold up to the quick frying that give a samosa it's crispy goodness.  Bananas seemed like the perfect solution.  But I needed something more...something chocolaty.  It tool me about a half a second to decide to add some Nutella.


Once I had all the ingredients sorted out it was time to start cooking....

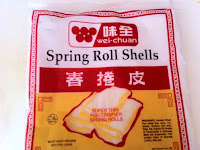
1.  Cut the spring rolls into thirds.  I cut about 10 at a time.  I also keep them wrapped in a damp paper towel or else they will dry out and be hard to fold.

2.  Slice the banana and then cut each slice in half.   Mix about a tablespoon of four with enough water to form a loose paste.

3.  Using 2 sheets at a time, fold according to the illustrations below.

4.   Put about 5-6 banana slice halves into the pocket, and a little squirt of Nutella.  I found that the best way to get the nutella in there was to pipe it in using a plastic bag with a corner cut off. 

5.  Complete the folding process, make sure to glue everything up with your flour paste.

6.  Fry those suckers up until they are a lovely golden brown.  As you can see from the photo below I am the world's most pathetic fryer.

7.  Once they are done frying put them on a paper towel for a few minutes to drain off the excess oil.

8.  Try to wait until they are cool enough to eat without burning your tongue.


It only takes a few minutes to fry them up and if you have a deep fryer you can probably put quite a few in at a time.  The frying crisps up the outside, melts the nutella a little but and makes the bananas wonderfully warm and just a little mushy.  I highly recommend eating them as soon as they are cool enough, but they will keep nicely for a few hours.


Folding Instructions:
step 1:  Lay a double layer of spring roll wrapper on your work surface


step 2:  Fold one corner over so that the top corner touches the lower edge.  Using your flour paste, glue the flap to the back.
step 3: fold over the remaining side until there is nothing left to fold.  Glue it all down liberally. 


Wednesday, October 20, 2010

Farm Fresh Wednesday - End of the Season

Our farm share has officially ended for 2010.  But there is still fun to be had at the farm.  We took advantage of the great weather this weekend to take a drive out to Bluemont to do some farm fresh pumpkin picking.  While we were there we took advantage of some of the other fun the farm has to offer.

We took advantage of the pumpkin jumping pillow.
We dug in the corn crib.
We got up close and personal with some chickens.


And we got a great haul of both carving and pie pumpkins....did someone say pumpkin cranberry bread???  All in all, this summer's farm share was great fun!  Thanks Great Country Farm!


Tuesday, October 19, 2010

No Bake Pumpkin Pie??

I have a general aversion to recipes labeled as "No Bake".  I feel that if something can be baked then it probably should be.  Baking is good...No Bake is the slacker's way out.  (I realize that that is not really true, but we all have our delusions.)  But desperate times call for desperate measures.  With our oven out of commission for almost an entire month (OH the Horror!!!) I needed a dessert fix and no bake was my only option.  I decided that if I was going to go no bake I'd have to go the the authority...Cook's Illustrated.  Without too much pain I located at recipe for no bake Pumpkin Pie.  I was skeptical, but I put my faith in Christopher Kimble and plunged ahead.  I made some minor alterations.  I steamed and pureed a pumpkin from the farm instead of using canned pumpkin.


I was also forced to use a pre-made graham cracker pie crust. 

The recipe is different from anything I have made before.  Essentially, you are combining a gelatin mixture with a custard mixture.  I don't know how the folks at CI come up with this stuff, but the result was a creamy, and light, but really really tasty!  I don't know about other no bake recipes, but this one was a huge success!  I just may be inspired to branch out and try some other no bake recipes....especially if that damn oven doesn't get here soon!


Ingredients


Graham Cracker Crust
   5 ounces graham cracker crumbs (9 whole crackers), broken into large pieces
   2 tablespoons sugar
   5 tablespoons unsalted butter , melted and warm

Pumpkin Filling
   3 tablespoons orange juice (cold)
   2 teaspoons vanilla extract
   2 teaspoons gelatin (from 1 package)
   1 cup heavy cream (cold)
   2/3 cup sugar (4 3/4 ounces)
   3/4 teaspoon table salt
   1 teaspoon ground cinnamon
   1/2 teaspoon ground ginger
   1/4 teaspoon ground nutmeg
   1/8 teaspoon ground cloves
   3 large egg yolks
   1 (15-ounce) can pumpkin puree (1 3/4 cups), (plain, not pumpkie pie mix)


Instructions

FOR THE CRUST:

1.  Adjust oven rack to lower-middle position and heat oven to 325 degrees.

2.  Pulse crackers and sugar in food processor until evenly and finely ground, about fifteen 2-second pulses (you should have 1 cup crumbs). Add warm butter in steady stream through feed tube while pulsing until crumbs are evenly moistened and resemble damp sand. Transfer crumbs to 9-inch pie plate and spread evenly over bottom and sides; wipe out food processor bowl and reserve. Using flat-bottomed ramekin or dry measuring cup, press and smooth crumbs into pie plate (see illustration, at left). Bake until fragrant and browned around edges, 15 to 18 minutes. Cool completely on wire rack.

FOR THE FILLING:

3.  Stir orange juice and vanilla together in medium bowl. Sprinkle gelatin over orange juice mixture and set aside to thicken, about 5 minutes.

4.  Combine 1/2 cup heavy cream, 1/3 cup sugar, salt, and spices in small saucepan. Cook over medium-low heat until bubbles form at edges; remove from heat. Whisk remaining 1/3 cup sugar and yolks together in medium bowl until pale and slightly thickened. Slowly pour hot cream into yolk mixture, whisking constantly. Return mixture to pan and cook over medium-low heat, stirring constantly and scraping bottom of pot with heatproof spatula, until custard is thickened and registers 175 to 180 degrees on instant-read thermometer, about 2 minutes. (When properly cooked, custard should form slight ridge on tip of spatula when bottom of pan is scraped and spatula is lifted.) Immediately pour custard over gelatin mixture and stir until smooth and gelatin has completely dissolved.

5.  Puree pumpkin in food processor until smooth, 10 to 15 seconds. With machine running, add remaining 1/2 cup heavy cream through feed tube in steady stream. Scrape sides of bowl and process for additional 10 to 15 seconds. Add pumpkin mixture to custard mixture and stir until completely smooth. Transfer filling to cooled crust. Chill pie, uncovered, until filling is just set, about 3 hours. Cover pie with plastic wrap and continue to chill until fully set, at least 6 and up to 24 hours. Cut pie into wedges and serve.

Monday, October 18, 2010

Meal Plan Monday - When the #*!! is that oven going to be delivered edition


This weeks menu plan is totally up in the air. I don't know when our new stove will get her so I can't really plan meals that rely on any sort of oveny goodness. Add to that the fact that is is starting to feel more like fall and I'd really like to engage in some therapeutic baking. The fates can be cruel.

After much soul searching I've decided to plan for the best (plan for the best hope for the worst...that's how is goes right??) and assume that the oven will be delivered by Tuesday. Seriously....what could go wrong? <---famous last words


Sunday - Indian-Style Curry with Potatoes, Cauliflower, Peas, and Chickpeas (this is a special request from my oldest son...how can I deny this?)

Tuesday - Maple-Orange Glazed Chicken

Thursday - Charcoal-Grilled Bratwurst with Sauerkraut and Apples

Saturday - Take out from Preet Palace

This weekend we are going out to the commissary for a big time shopping trip.  This is one of those every three week trips I talked about here.  So, I'm going to give you a preview of what's coming up over the next three weeks....in no particular order:


    Chicken Paprikash
    Chicken Tikka Masala
    Hungarian Beef Stew
    Ricotta Calzones
    Stuffed Portobello Mushrooms with Spinach and Goat Cheese
    Easy Tortilla Casserole
    Honey-Sesame Pork Tenderloin with Spicy Scallion Salad
    Turkey Tetrazzini Pasta
    Chicken Nuggets
    Skillet Meatballs and Noodles in Creamy Herb Sauce


Friday, October 15, 2010

Potato Leek Soup

The weather is finally starting to look a little fall like here and that means that I am starting to think about soups, chowder and stews.  I love to have a big pot of soup simmering on the stove-top for lunch or dinner on a crisp fall day.  One of my very favorite soups is Potato Leek Soup.  If you haven't cooked with Leeks before you are totally missing out!  Leeks have a wonderful mild onion taste and they cook up beautifully, getting soft, but not mushy in soup.  The potatoes at not only bulk to the soup, but a thick silky texture as well.  As if all that weren't enough, this soup can be whipped up in about 45 minutes.   No need to wait hours, salivating, while your soup simmers!


Here is the recipe from Cook's Illustrated, with my open personal little adaptation.


Ingredients
6           tablespoons unsalted butter
4 - 5      pounds leeks (see note above)
1           tablespoon unbleached all-purpose flour
5 1/4    cups chicken stock or canned low-sodium chicken broth
1          bay leaf
1 3/4    pounds medium red potatoes (about 5), peeled and cut into 3/4-inch dice


Instructions
1. Cut off roots and tough dark green portion of leeks, leaving white portion and about 3 inches of light green. Slice in half lengthwise and chop into 1-inch sections. (You should have about 11 cups).

2. Heat butter in Dutch oven over medium-low heat until foaming; stir in leeks, increase heat to medium, cover and cook, stirring occasionally, until leeks are tender but not mushy, 15 to 20 minutes; do not brown. Sprinkle flour over leeks and stir to coat evenly; cook until flour dissolves, about 2 minutes. Increase heat to high; whisking constantly, gradually add stock. Add bay leaf and potatoes; cover and bring to boil. Reduce heat to medium-low and simmer, covered, until potatoes are almost tender, 5 to 7 minutes. Remove pot from heat and let stand until potatoes are tender and flavors meld, 10 to 15 minutes. Discard bay leaf, season with salt and pepper; serve immediately.


MY NOTE: If you really want to go crazy, at the beginning of step 2 fry up about 4 oz of cut up bacon. Remove the bacon pieces, and use the bacon fat to cook the leeks. Continue as directed.

Thursday, October 14, 2010

Comfort food

We are finally experiencing some fall weather here at chez foodie. And, for me, cooler weather means comfort food. Add to that the fact that more than half of the family is recovering from a vicious stomach bug and you have the perfect reason to make one of my favorite comfort foods. Grilled cheese and tomato soup.


As the mother of three boys who are only getting hungrier and hungrier by the day I envision a future where my trusty skillet with it's two sandwich capacity will be painfully inadequate. So you can imagine my excitement when cook's country published a method for making grilled cheese en mass.

1. Preheat the oven to 450 degrees. Place two rimmed baking sheets in the oven to heat up.
2. Assemble the sandwiches in the desired manner.
3. Remove one sheet from the oven and place the sandwiches in a single layer. Carefully place the second sheet on top of the sandwiches (rim up) and place on the middle rack of the oven. Bake for 5 to 6 minutes or until the sandwiches are golden brown.


You can make 8 sandwiches this way! That should be enough to keep my boys at bay for a few minutes!

Wednesday, October 13, 2010

Farm Fresh Wednesday

Our Community Supported Agriculture subscription is coming to a close.  We are enjoying a bounty of fall harvest items this week such as pie pumpkins, acorn squash and apples.  We are planning a trip out the visit the farm this weekend for some serious pumpkin picking!


Tuesday, October 12, 2010

Oven Repair and Guilty pleasures

First, let me be clear that oven repair is NOT one of my guilty pleasures.  I'm twisted, but I'm not that twisted.

My oven is STILL not working.  2 visits by a appliance technician, countless calls to the unpleasant woman who answers the phone at Betty's Appliance Repair, a complain to Maytag and almost $300 later I am right back where I started from. 

Not my actual repair man!
The guy came to fix the oven last Thursday.  It took him less than 20 minutes and everything seemed fine (though in retrospect, I'm now certain the the oven was not actually fixed.)  I was so excited to have my hotbox back that I started baking.  One batch of cookies and 24 hours later and the oven quit on my again.

I called the company back, irate, and demanded that someone come right back out and fix it again.  I was told that someone would be by on Wednesday (I don't do irate or demanding very well it would seem.)  When the guy arrived I was told that something ELSE had gone wrong and that the repair would cost me another $400.  Right then and there I shut the whole operation down. I wasn't going to pay almost $700 to repair an oven that less than 3 years ago cost me $700. 

This brings me to the guilty pleasures part.  I was so irate, so incensed, so totally ticked off that I had to run out and indulge in one of my less attractive guilty pleasures.


Two things about this photo.  First it was taken in the car.  This is where I indulge in such things, I remove all traces of evidence before returning home.  Second, I have expunged it from my iphone.  If pressed I will disavow all knowledge.

I think that I'm going through baking withdrawal....

Monday, October 11, 2010

Menu plan Monday - STILL ovenless edition


That's right dear readers, I am still without an oven.  What is that you say?  You would like to to hear more about my desperate situation?  Well, fear not!  Tune in tomorrow when I will go into full on raging rant mode and fill you in on the whole sordid tale.

Tuesday - Simple Ground Beef Chili with Kidney Beans

Thursday - Almost Hands-Free Risotto with Chicken and Herbs.

Saturday - Crispy Pan-fried Pork Chops with Latin Spice Rub

Sunday - Grilled Chicken Kebabs with Southwestern Marinade

Friday, October 8, 2010

Super Size It

There are some recipes that are so good that you can't make just one.  There are some dishes that emerge from the freezer in such wonderful shape that it's a sin to only produce one batch.  And finally there are meals that even your picky 4-year old will consume with little to no bargaining.  Few and far between are the meals that satisfy ALL of these parameters.  These meals beg to be made in bulk.

I have a few tips for bulk cooking.

#1 - Don't be a hero.
I know that there are some of you out there who set aside a whole day to do your bulk cooking.  Cranking out 4-6 different recipes.  If you can get away with this I say go for it!!  If, like me, you have 3 insane children who you can't foist off on a neighbor or family member you're going to need to scale back a little.  I take a few minutes to do all the chopping while the baby is eating breakfast.  I gather the herbs from the garden while he is chasing a ball in the yard....you get the idea.  Break it up into smaller, more manageable bits. 

#2 - Plan ahead.
Okay....me saying plan ahead is like Lady Gaga preaching everything in moderation, but fact is, bulk cooking is serious business.   You don't want to be elbow deep in spaghetti sauce or 4 pans of lasagna only to realize that you only have enough noodles for 2 pans.  Get all your ingredients together beforehand.  Supersizing will usually include some sort of math, so don't be afraid to whip out your calculator. 

#3 - Get big stuff
Supersized cooking requires supersized cookware.  While you can, technically, fix 2 quarts of pasta sauce in a 2 quart stockpot it isn't a very good idea.  This is the voice of experience talking.

#4 - Bask in the glow
There is nothing quite so wonderful as finally putting away enough food to feed your family for several days.  (Okay, realistically there are probably a lot of things far more wonderful, but this is pretty darn good.)


Thursday, October 7, 2010

Caramel crumb bars

As soon as I saw these on Smells Like Home I knew that I had to make them.  As soon as the repair guy left the house I was pulling out the mixer!

This cookie was really simple to make, especially considering that there is a caramel layer.   The secret is the condensed milk.  By using the condensed milk you avoid the whole making caramel bit.  Making caramel takes a good long time, it can be a bit fiddley and quite frankly it's also a little dangerous.  I'm not necessarily opposed to a little culinary danger, but when cooking with a 4-year-old sous chef that sort of thing is best avoided.


The recipe is from Smells Like Home click here to get there!

Wednesday, October 6, 2010

Farm Fresh Wednesday

The farm deliveries are coming to a close for the year and I just don't know what I'll do without my friendly red plastic bin every Wednesday.

 This week we got the following in our bin:
              Cabbage (perfect for confetti Slaw!!)
              Potatoes
              Green Beans
              Apples (I LOVE apples from the farm!)
              little cherry tomatoes
              Green Peppers
              White Patty Pan squash


Tuesday, October 5, 2010

Once upon a time

Since I have no baking to show you, I thought that maybe I'd regale you with the story of how be bought our old oven.  It is a harrowing tale that involves Christmas, overflowing toilets, salmon and fire.  I'll wait while you get the popcorn.

Okay...here we go-----


My youngest son was just about a year and a half at the time and had taken to playing with the knobs on the stove. Being the diligent parents that we were we decided that in order to avoid perishing in an enormous ball of flames we should remove the knobs and store them at a less toddler accessible location. For several months this worked like a charm. We could just slide the knob on to turn on the stove or adjust the oven temperature.

Then we lost the oven knob (it's been almost three years and we still haven't found that damn knob). As you contemplate our situation please keep in mind that there are 4 stove top knobs and only one oven knob. To further complicate the situation the oven knob is integral to obtaining the correct oven temperature. Undeterred (and unwilling to shell out $700 to replace an entire oven when we only needed what amounted to a 50 cent knob) my ever resourceful husband employed a pair of needle nose pliers to turn the pin that regulated the oven. As far as oven temperature went, we just sort of eyeballed it. This was working out okay until the little pin broke....while the oven was on....four days before Christmas. After a reasonable amount of swearing, Mr. Foodie managed to turn the thing off, but it became clear that the stove was now probably beyond reasonable repair. Couple this with the fact that Mr. Foodies's family was expecting us to host the Christmas holidays. (Did I mention that Christmas was now only 4 days away?)

Thankfully, the good people at Lowes not only sell ovens, but also offer next day delivery. Two days later (Christmas eve eve) we were back up and running. The house was clean (or as clean as a house containing two boys under the age of five can ever be), the tree was up, the light were all a twinkle...well you get it. I started to think that we just might pull the whole thing off, I got cocky, then karma kicked me in the arse.

One of my oldest sons ENORMOUS bowel movements cause the toilet to overflow. Naturally no one noticed until I went into the basement to get some laundry. I was greeted by an unholy waterfall in my (thankfully unfinished) laundry room. After a lot of unpleasant mopping and airing out and scrubbing everything seemed to be okay. The carpet had been unaffected and we seemed to have caught it before any damage was done. Being folks of good humor, we laughed nervously at our exploits, the phrase "what else could happen?" may have been muttered.


The next day was Christmas eve. We hit the grocery store and while it was ridiculously crowded, by some miracle they had everything we needed to prepare our feast of seven fishes that evening. The feast of seven fishes is an Italian Christmas eve tradition. Most of the dishes are comprised of shellfish, but we had decided to add a baked salmon dish as well. I had written up a detailed game plan for the day. Every 5 minutes from 2pm until dinner was on the table at 6:30 had been accounted for.


The family started arriving around 3pm. Dinner was coming along nicely, Mr. Foodie was greeting our guests and entertaining the boys. Suddenly my husband disappears. A few minutes later my mother-in-law informs me that he is calling me from the bedroom. This clearly isn't going to be good. I find him curled into the fetal position on the bed, sick as a dog.


Don't be mad. He's not sick on purpose. I tell myself. I look at my carefully crafted schedule and realize that I just don't have time to kill him right now. Instead I send my older son up with some ginger ale and assume that he will survive the night.


Around 6:15 my mother-in-law wanders into the kitchen and asks what is for dinner. I begin to explain to her the tradition of the seven fished, excitedly expounding upon the interesting culinary treats I have planned. It is then that she informs me that she is allergic to shellfish. I momentarily rethink my decision to allow my husband to live. I quickly regroup and realize that we still have the salmon. The lovely cut of salmon that is currently finishing up in the oven.


"Well, there is still the salmon." I reply.  As though on cue the dinger on the oven goes off and I pull open the oven door to find my salmon ON FIRE!! The potato chip crust had burst into the flames under the broiler. I threw a damp kitchen towel over the fish. Through the grace of God the towel actually did not catch fire and managed to quell the flames. My mother-in-law looked on, horrified, as the smoke alarm went off. She ended up eating plain pasta and well cooked salmon for Christmas eve dinner.


Every year since my in-laws have brought a pre-cooked ham to our home for Christmas eve dinner.

Monday, October 4, 2010

Menu Plan Monday - Ovenless Edition


In case you haven't heard, my oven is out of commission until Thursday (Hopefully the oven guy will be able to fix it).  So, since my family still needs to eat, I present the ovenless Menu Plan.

Tuesday -Simple Beef Chili with Kidney beans.

Thursday - Chicken in the pot with Carrots, mushrooms and Thyme

Saturday -Tacos

Sunday - baked Beans, confetti Slaw, Barbecue pork.

Friday, October 1, 2010

Farm Fresh Wednesday

Our Community Supported Agriculture season is drawing to a close.  We are receiving lots of delicious fall harvest items that I really wish I could use for BAKING!!  But of course, the oven situation is still in limbo, happily these beautiful pumpkins and squash will hold for a while until we sort out the issue with the hotbox.


Technical difficulties

We are having so technical difficulties here at chez foodie.  It seems that our oven has stopped working.  This would be the MAYTAG oven that we purchased only 3 years ago.  When Mr. Foodie called MAYTAG about our broken oven he explained that since an oven is considered a durable good it should probably be a bit more, you know, durable.  The service technician was not particularly helpful.

So we went to the enormous home improvement warehouse, where we had originally purchased to oven. (I'm not sure what Mr. Foodie expected to accomplish here, but I went along for the ride.)  Similarly, the salesperson there had little to offer.  When we were told that next time we may want to buy the extended warranty I nearly had to restrain Mr. Foodie to keep him from pummeling the man with a burner grate.

So now we are deciding if we want to pay nearly as much to have it fixed as we did to originally buy it or if we want to buy a new one.

I'm pushing for a new Wolf 60 inch dual oven gas range.  A girl can dream can't she?