Well my friends, I know a challenge when I hear one!
First I had to decide on a suitable dessert type filling. I asked a number of experienced cooks, including Shyama's mother and got a number of interesting ideas. I decided that I wanted a fruit filling, something that didn't really NEED to be cooked, but that would hold up to the quick frying that give a samosa it's crispy goodness. Bananas seemed like the perfect solution. But I needed something more...something chocolaty. It tool me about a half a second to decide to add some Nutella.

Once I had all the ingredients sorted out it was time to start cooking....
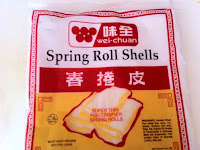
1. Cut the spring rolls into thirds. I cut about 10 at a time. I also keep them wrapped in a damp paper towel or else they will dry out and be hard to fold.
2. Slice the banana and then cut each slice in half. Mix about a tablespoon of four with enough water to form a loose paste.
3. Using 2 sheets at a time, fold according to the illustrations below.
4. Put about 5-6 banana slice halves into the pocket, and a little squirt of Nutella. I found that the best way to get the nutella in there was to pipe it in using a plastic bag with a corner cut off.
5. Complete the folding process, make sure to glue everything up with your flour paste.
6. Fry those suckers up until they are a lovely golden brown. As you can see from the photo below I am the world's most pathetic fryer.
7. Once they are done frying put them on a paper towel for a few minutes to drain off the excess oil.
8. Try to wait until they are cool enough to eat without burning your tongue.
It only takes a few minutes to fry them up and if you have a deep fryer you can probably put quite a few in at a time. The frying crisps up the outside, melts the nutella a little but and makes the bananas wonderfully warm and just a little mushy. I highly recommend eating them as soon as they are cool enough, but they will keep nicely for a few hours.
Folding Instructions:
 |
| step 1: Lay a double layer of spring roll wrapper on your work surface |
 |
| step 2: Fold one corner over so that the top corner touches the lower edge. Using your flour paste, glue the flap to the back. |
 |
| step 3: fold over the remaining side until there is nothing left to fold. Glue it all down liberally. |


No comments:
Post a Comment